Tuesday, November 29, 2011

Meet Smoosher member My Polymer Clay Canes

 Janie, of My Polymer Clay Canes on ArtFire, creates a wide variety of gorgeous canes and beads.  She was kind enough to answer a few questions about her work for us.
Pink and White Polymer Clay Kaleidoscope Cane Polymer Clay Kaleidoscope Cane Yellow Blue Purple Polymer Clay Bright Pink Flower Cane Raw Unbaked
With all the mediums available for crafting why did you choose Polymer clay?
I love the versatility of polymer clay. Most of all, I love the possibilities of what you can create with it. It is endless. You are only limited by your own imagination. And, that there is no waste. If something doesn't work out the way you want, you can just smoosh it all up and start over.

How did you learn to use polymer clay? Internet, experimenting, books, classes.....
I began by just experimenting. When I started, there wasn't much out in the way of books, or classes. That all came later.
What is your favorite tool to work with?
I could never confine myself to just one tool...but if I had to, I guess it would be my pasta machine. Simply because it makes the conditioning so much easier and faster. On second thought, make that the pasta machine motor! I can no longer live without that.

Do you like to work with any mediums other than polymer clay?
Definitely! My other love is precious metal clay. I mainly work in silver. It comes in a clay form also, but is .999 pure fine silver after firing, versus sterling which is .925. The only draw back to it that I've found so far is the expense. Luckily, my customers don't seem to mind. I stay very busy year round in my local area with custom orders for silver pendants and earrings. I also work in resin. I will usually use resin to make dried flower or found object pendants.

What is your favorite polymer clay technique and why?
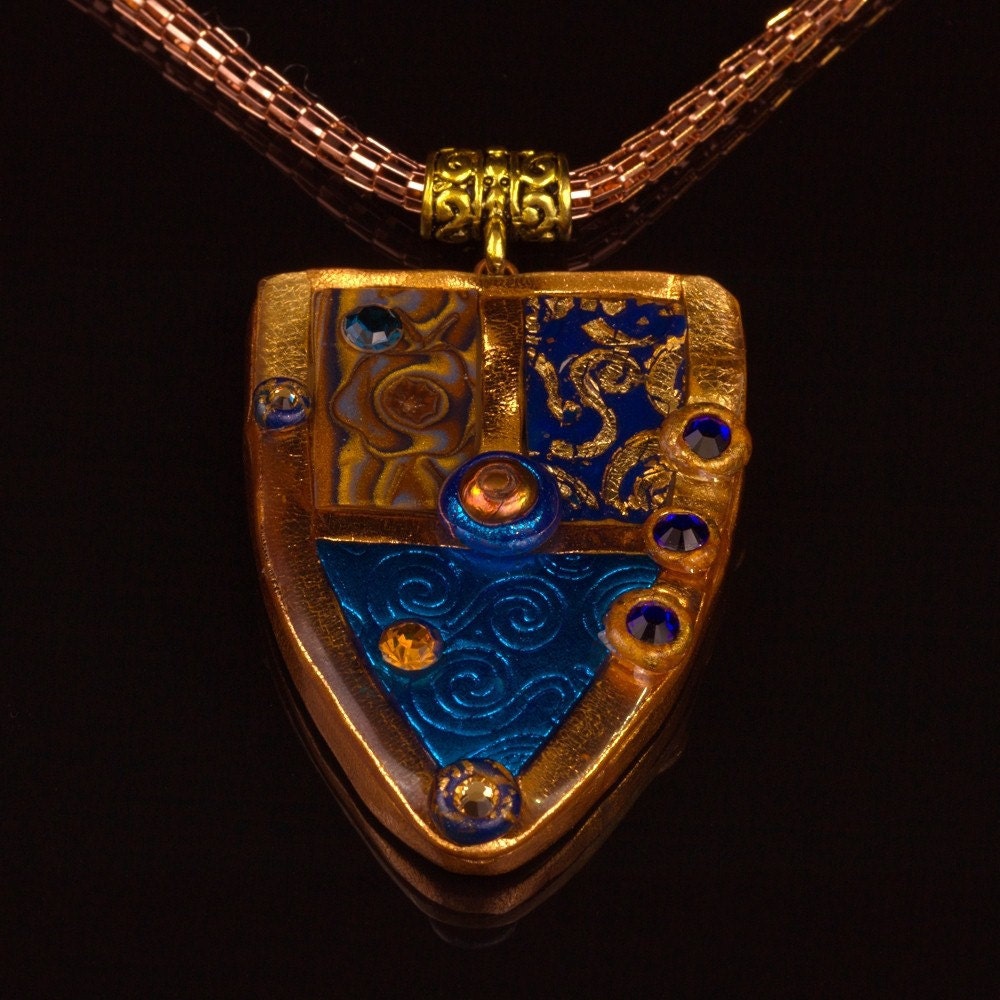
I love to make canes the most. Every single cane I make fascinates me after the reduction. It doesn't make a difference what type of cane it is either. My other favorite thing is making keepsake boxes. It's a great way for me to use my canes. I think I love putting the patterns and colors together. I especially love the ones that end up looking like quilt patterns. Like this one:
http://lifeartdesign...m-old-cane.html

It doesn't matter what type of cane you use to make these boxes. It's all about putting the slices into a pattern. That is, if you're going for a "quilty" look.

What is your least favorite technique and why?
Conditioning the clay, especially Kato clay. It takes to long and it's hard on my hands which are becoming arthritic. Oops, I guess that's not really a technique. I suppose sculpting would be my least favorite. I don't know why though, because I love doing that in silver clay.

What is on your "to do" or "to learn" list?
I think there will always be a million things on my to do list! To many things to list here. The latest thing that I just added to my list is Alice Stroppel's new caning technique. It can be seen in this Polymer Clay Daily feature:
http://polymerclayda...olymer-strudel/

Do you mix your own colors? Why or why not?
I almost always mix my own colors. I think it gives your work a more authentic look. So, I have this big bin of colors left from clay that I have previously mixed for past projects. Well, those end up getting mixed or blended for other things...and on and on. That bin is always full. Which is great, because when I need to make colors for a cane, they're already there usually.

How do you keep your designs fresh and original?
By exploring and experimenting. I also think working in different mediums besides polymer clay helps. It gives your brain a chance to rest from that and refocus.

What keeps you from getting into a creative rut?
Sometimes, no matter what you do, you can end up in a rut. It can be very discouraging. But, I view it like a writer's block. For some reason, I think it's just a part of the creative process. At any rate, it helps me get my studio cleaned! Because that's usually what I do when it happens. Once I get my tables all clean and things back where they belong...BAM! Next thing you know, I'm back at it with new ideas.

What is your favorite brand of clay if you have one and why?
Kato is my favorite for caning and strength. Premo is a close second. It's just easier to use and condition.

Is there anything else that you would like to add?
One of the things I love most about polymer clay is the community of people I have met. My first place of finding that community was www.polymerclaycentral.com . Those people and many others that I have met online, (and some of them in person), are the most caring, sharing, wonderful people! It has turned out to be that way with almost all of the polymer clay folks I have met so far. I think the more we all share, the better we all get, and the further our craft advances as an art medium.

Janie

Posted Image 
You can also find Janie online at http://www.flickr.com/photos/lifeartdesigns/ and http://lifeartdesignsbyjanie.blogspot.com/.  Her work is truly amazing!


Find the Smooshers on Facebook 
Visit the Smooshers Blog
Check out the Smooshers guild on ArtFire 

Wednesday, November 23, 2011

The new ArtFire Guild Halls are now open!

It's been a long wait, but ArtFire has finally opened the new and improved guild halls!  And the wait was certainly worth it!  The forums, which are accessible to guild members only, are exactly like ArtFire's main forums, making them easy to navigate and familiar to most guild members.  The public section of the guild hall is pretty awesome too. Here is the link to the Polymer Clay Smooshers guild on ArtFire http://www.artfire.com/guilds/polymer_clay_smooshers.  Here you can view our collections, browse sales and specials being offered by guild members (I love that feature!), read more about the guild, and apply for membership.  The requirements for membership in the Polymer Clay Smooshers guild are fairly simple: you need to have an active shop on ArtFire and you need to have at least 3 polymer clay items for sale (this helps us promote your shop).  Our members range from people who have only been working with polymer clay for a few months, to members like myself who have been smooshing for over ten years.  And we all learn so much from one another!  No matter what your level of experience is, you can be an asset to this guild!  It's all about learning and sharing, and I believe that the learning never stops. 
We'll be moving our forums from http://polymerclaysmooshers.invisionzone.com/ to http://www.artfire.com/guilds/polymer_clay_smooshers/info in order to simply things for guild members.  Nothing will be deleted from the invisionzone forums however. 
I want to thank you all for supporting the Polymer Clay Smooshers guild and invite you to continue to share our creative journey!
Find the Smooshers on Facebook 
Visit the Smooshers Blog
Join the conversation on the Smooshers forums 

Sunday, November 20, 2011

How To Make a Polymer Clay Poinsettia Cane by Artmakers Worlds

This post was written by Jen of Artmakers Worlds on her own blog located at http://www.artfire.com/ext/shop/blog/ArtmakersWorlds and she was kind enough to let me share it here as well.


Just for fun, the making of a poinsettia cane.

You can find this cane listing by clicking here.

Posted Image


I won't walk everyone through every single step in cane building, in fact I didn't even think to photograph this until I had a good start. But if you want an idea of how canes are made, there is plenty of info here.
Enjoy.


The petals and leaves are all made the same way. It's a basic leaf cane. In short, you run a few colors side by side through a pasta machine, fold and run over and over. This is called a "skinner blend." Roll that up and you have a "plug." Each end of this plug will be a different shade. Well what I want is a plug that runs one color along one side, not each end. So I compress the ends together and stretch the sides until I have a plug with colors side by side instead of end to end. Cut that and add the veins, and I'll show this later in the demo.


The center part is simple. Make a log of one color, wrap it with another. Reduce, cut into several equal sections, put them side by side, reduce again. Do this as many times as you need to get the number of center dots you want.

Posted Image

So I've made my basic leaf in red, reduced that long enough to cut a dozen sections. The first six got tacked to my center piece,
Now I snug the next six around those. And that's our flower.

Posted Image

Next, I need to find a green to use for the leaves. As it turns out the only green I have on hand is a real bright one. Too bright.
Well before I got into polymer clay I was a painter so blending colors is second nature to me. The way to "tone down" an obnoxious shade of anything is to use a bit of it's opposite on the color wheel. The opposite of green is red. Just a touch of red will bring down the yikes factor just enough to make a nice leaf. The scraps I had from the ends of the flower part is perfect. The photo shows the green I started with and what a touch of red blended in makes.
Now I have enough to make the dark leaf veins as well as some shadow at the base of the leaves.

So again, I made a plug, then compressed it and pulled it sideways to make a plug that is dark on one side and light on the other.
As with any basic leaf, slice this in half and insert a sheet of dark green. Slice both sides and insert sheets as the leaf veins. Voila. Now reduce that long enough to make six or seven sections.
Posted Image Posted Image


So here I've added the reduced leaf sections. How many you add at this point is not that important. Note I have two leaves side by side on one spot.
Posted Image


Now it's time to start packing with translucent. Being careful to make triangular shapes that fit between the leaves so their shapes don't get mushed together.
Posted Image


And here is my cane fully assembled and ready to start reducing.
Posted Image
Note, I'm not covering how to reduce a cane. Basically I start by simply squeezing this thing. Squeeze, turn, squeeze, turn. Once it grows in length enough I start squeezing the center until it forms sort of a waistline. This is how all canes get reduced. It's time consuming, and sometimes it's a bit of a work out. Just gotta go slow, compress from the center out towards the ends. All those air spaces will be squeezed out and the design gets compressed together.
Never roll a cane to reduce. That will twist the design and trap in any air pockets.


Here is my smiling mug (yikes) holding the cane just before the reducing process. Gives you and idea how big cans are before they get shrunk and stretched. This one is actually a medium size. I've made a few that were twice as big as this. If not larger. those are such a work out to reduce though, every time I end up with one that big I say to myself "self? Don't DO that again."
This one was not a problem to reduce. Good size.
Posted Image

And finally, here are my freshly reduced and cut pieces ready to be wrapped and stored until some wonderful customer decides to buy and turn into creative things.
Posted Image

Hope you enjoyed the life of a cane.

Jen

Find Artmakers Worlds online at http://www.flickr.co...rtmakersworlds/, http://twitter.com/#!/artmakersworlds, and http://artmakersworlds.com/.http://artmakersworlds.com/.

Find the Smooshers on Facebook 
Visit the Smooshers Blog
Join the conversation on the Smooshers forums 

Saturday, November 19, 2011

Brown makes DreamWeavers Designs think of the holidays

Jan of DreamWeavers Designs wrote this post.

Brown


This weeks Smooshers topic is brown. Thinking of the holidays coming brings to mind a lot of brown. Now, some of you may be thinking...brown??? what brown? With colder temps, the leaves will be turning brown and falling in piles on the lawns. Think golden brown turkey. Umm, chocolate chip cookies are my favorite and a staple around Christmas. And, some people love fruit cake. {Yes, I happen to be one of them} This holiday, browse through the Smoosher's ArtFire shops for truly one-of-a kind, handmade items. I'm sure you will find the perfect gift for that someone special. I recommend you search early so you don't miss anything!

Speaking of leaves, check out AmyCrawley's shop to see more unique works like this light switch cover.

Posted Image
Cynthia Blanton Studio has several mixed media pieces.

Posted Image

May not be all brown, but how cute are these Christmas mice from QuernusCrafts!!

Posted Image


Don't forget to check out our ArtFire shops. Just go to http://www.polymercl...s.blogspot.com/ Hope you have as much fun looking at all the wonderful, creative pieces that I did.

Til next time, remember:
"Whether you think that you can, or that you can't, you are usually right."
- Henry Ford (1863-1947)
Follow DreamWeavers Designs blog at http://dreamweaversd...s.blogspot.com/, and visit her ArtFire shop at http://www.artfire.c...mWeaversDesigns
Find the Smooshers on Facebook Visit the Smooshers Blog Join the conversation on the Smooshers forums

Wednesday, November 16, 2011

A Collection of Christmas Creations from the Polymer Clay Smooshers guild

Find the Smooshers on Facebook
Visit the Smooshers Blog
Join the conversation on the Smooshers forums

Monday, November 14, 2011

Grays Crafts shares how to make a polymer clay cameo

Recently one of our guild members asked how to make a polymer clay cameo and Grays Crafts replied,

"If you need it in one piece (without background), that's what I do. Get translucent and ecru clay, roll out on thickest setting each of them. Stack on top of each other and roll through machine again. Tear in half, stack and roll. I usually stop when there is 30-60 very thin layers. Then create striped cane - slice stack in parts, stack parts, so stripes become the working surface.

Get a good carved cameo (or your best doll face if you only need a face), spritz with water/automotive protectant and press into the molding material. Molding material - 2 part molding compound or Bake and Bend clay. I make all my custom stamps out of this clay. In case with component, let it set. In case with clay - bake with piece in place, if it can be baked or carefully pull it out. Don't bake clay in clay :).

Slice piece off the striped cane thick enough to fill the mold and push it into the mold. You want to spritz clay or the mold. Or both :). Stripes will get distorted. In my opinion, it gives them a more natural look. Make sure the back is level and generally decent and carefully pull out of mold. Bake, antique, heat set the patina, buff.

Imitates the look of ivory. You can add scratch-like marks before baking to make it look distressed. You can also create background for your cameo from the same faux ivory if you want.

Good luck! :)"

So there you have it- a fairly easy way to create your own polymer clay cameos! A big thanks to Grays Crafts for sharing her knowledge with us!
Find the Smooshers on Facebook
Visit the Smooshers Blog
Join the conversation on the Smooshers forums

Saturday, November 12, 2011

Find unique handmade gifts from the members of the Polymer Clay Smooshers guild

If you're looking for something special for your family and friends this holiday season, look no farther than the shops of the Polymer Clay Smooshers guild!  This video features the work of guild members Grumpy Grandmas Gift Shop, Gundowerks, Handmade Specialties, Harrison Hollow Designs, Illusion Everything, Into The Dawn, and Jaels Jewels.  Whether it's handcrafted jewelry or distinctive home decor, the Smooshers have what you're looking for!
Thanks for having a Handmade Holiday with the Smooshers!
Find the Smooshers on Facebook
Visit the Smooshers Blog
Join the conversation on the Smooshers forums

Wednesday, November 9, 2011

Meet Smooshers member Sharp Art by Dawna

 Dawna, of Sharp Art by Dawna on ArtFire.com, creates one of a kind pendants and unbaked canes.  She was kind enough to answer a few questions and allow us a look into her world of polymer clay.
Blues and Greens Diamond Polymer Clay Necklace Abstract Landscape Polymer Clay Pendant Cobalt Blue Flower Heart Polymer Clay Pendant Necklace
With all the mediums available for crafting why did you choose Polymer clay?
I had lost my job and had to move to a smaller place. I needed to start a home based craft business with a small studio. I chose polymer clay for lack of space. Never dreamed I'd love it so much!
How did you learn to use polymer clay? Internet, experimenting, books, classes.....
Internet was my main source for learning. Then I found facebook and bounced questions off the pros. I wasn't able to watch any dvds or videos until 8 months into my learning stage. I tried to learn as much as I could at a very fast pace.
What is your favorite tool to work with?
A double pointed knitting needle. I seem to use it for every piece I make. Very handy indeed.
Do you like to work with any mediums other than polymer clay?
I love creating designs on silk and landscape painting.
What is your favorite polymer clay technique and why?
I have so many. It really depends on what mood I'm in. I go through phases. One of my favs is making canes. I also love working with foils, inks and translucent clay. Then the Mokume Gane bugs bites and off I go on that.
What is your least favorite technique and why?
Haven't found a least yet.
What is on your "to do" or "to learn" list?
Dan Cormier's techniques.
Mica Shift
Janice Abarbanel's Crackling Lentil Beads
Grant Diffendaffer's lathe turned beads
Do you mix your own colors? Why or why not?
For the most part yes unless I need pearlized colors. I can custom create what I want plus I feel like I save money. I love to stock up on cobalt blue, yellows and red. I like to buy Fuchsia and Violet though as they are hard to mix.
How do you keep your designs fresh and original?
I try NOT to copy other's work although I do get inspired from looking at it. I don't know...things just come to me. I rarely even look at books.
What keeps you from getting into a creative rut?
I'll make something off the wall like a light bulb critter or something different.
What is your favorite brand of clay if you have one and why?
PREMO! PREMO! PREMO! It is flexible for bangles, strong in solid pieces like my pendants and it buffs to a glass like shine. Especially the black.

If you are new to clay give yourself time to learn. You had to learn to walk before you could run. Never give up. It can be quite a rewarding adventure!
Find the Smooshers on Facebook
Visit the Smooshers Blog
Join the conversation on the Smooshers forums

Sunday, November 6, 2011

Book Review: The Art of Jewelry Polymer Clay

This post was written by Anna of Grays Crafts

The Art of Jewelry: Polymer Clay by Katherine Duncan Aimone.

152 pages, soft cover, full color.

Posted Image

It is a wonderful book for intermediate to advanced clayers. I do not recommend this book to beginners. The projects in the book contain just a few illustrations each, and in most cases steps are not described in full, since, being an advanced clayer, you are supposed to know how to do elementary things. I have heard some negative reviews about this book, and they mostly came from beginners, which is understandable. If you are just starting your journey into the wonderful world of polymer clay, you may become disappointed and overwhelmed by this book and may be better off with simpler projects at first, reserving this one for the time when your skills will reach the next level. However, if you are an intermediate to advanced polymer artist, this book would be a sheer delight to you, as you would have a chance to challenge yourself while using well-familiar techniques and learning new ones. Following the instructions in the book, you would truly be making art jewelry, of quality and beauty such as to be easily displayed in an art museum.
The Art of Jewelry, as its title implements, is a jewelry-making oriented book, in other words, all projects in it are polymer clay jewelry. The book contains:
- 12 necklace projects;
- 7 pendant projects;
- 7 brooch/pin projects;
- 6 bracelet projects;
- and 3 earring projects.

Techniques you will be using (and learning) include:
- sculpting;
- forming;
- texturing;
- embossing;
- image transfer;
- transfer etching;
- screen printing;
- freeform mica shift;
- color blends, including Skinner Blend;
- caning, advanced caning and millefiori;
- faux tesserae mosaics (clay embossing);
- faux glass;
- faux ceramics (Celadon glaze);
- faux fresco (gelatin coating);
- creation of hollow forms;
- molding;
- antiquing.

Some of the projects require use of general metalsmithing skills, such as soldering, wire work and riveting.
The book’s cover states Katherine Duncan Aimone as the author, however she is the compiler and the author of the introduction to the book. The introduction is followed by the polymer clay jewelry basics chapter by Mari O’Dell. In that chapter, you can find information on:
- polymer clay, its properties, conditioning, storing and curing;
- materials that can be used with polymer, such as embossing powders, metal leaf, heat set inks and so on;
- an overview of basic and special tools used for working with polymer, including advice on making and using your own molds;
- finishing options and surface treatments;
- use of findings in polymer jewelry, including excellent instructions on attaching a pin back to polymer brooches.

Projects themselves start from the page 24. Artists whose projects are featured include:
- Judith Skinner (3 projects);
- Jacqueline Lee (3 projects);
- Pier and Penina (4 projects);
- Louise Fischer Cozzi (2 projects);
- Mari O’Dell (3 projects);
- Jennifer Bezingue (3 projects);
- SL Savarick (2 projects):
- Stephanie Jones Rubiano (1 project);
- Sandra McCaw (1 project);
- Lindly Haunani (3 projects);
- Jeffrey Lloyd Dever (1 project);
- Leslie Blackford (2 projects);
- Julia Converse Sober (3 projects);
- Wendy Wallin Malinow (2 projects).

The beautiful cover piece, Snow Flower Brooch by Sandra McCaw, is included in the book and is an advanced caning project.
Book contains a lot of useful tips. There is a wonderful inspiring Gallery section which alone makes book to be worth its price. You can learn things by just looking at these beautiful high quality photographs. Pieces presented in the Gallery are advanced to ultra advanced. At the end of the book you can find short bios of the artists whose projects are featured, alone with their contact information. And like all of that already was not enough, the book also contains a metric conversion (inches to centimeters) chart.

I got my book on Amazon.com for $12.76 and, since my husband is a Prime member, shipping was free.
I would give this book six stars out of five and highly recommend it to advanced clayers interested in jewelry projects.

Below you can see a picture of a project I created after reading this book:
Posted Image

You can find Grays Crafts online at http://grayscrafts.com/, on Facebook, Twitter, and her ArtFire shop.

Find the Smooshers on Facebook
Visit the Smooshers Blog
Join the conversation on the Smooshers forums

Friday, November 4, 2011

All Things Polymer Clay curated by Sharp Art by Dawna

This beautiful collection features the work of some of the Polymer Clay Smooshers guild members and was curated by Sharp Art by Dawna.


You can click on any of the pictures to view the listing, and while you're there be sure to check out the entire shop.  You never know what delights you might find!

Find the Smooshers on Facebook
Visit the Smooshers Blog
Join the conversation on the Smooshers forums