Monday, August 29, 2011

Interweaving Nature with Polymer Clay


Every polymer clay artist struggles with their sense of self.  How do I want to express myself?  Do I want to create realism or whimsical?  What is the best way to have my work speak to my audience?

We strive to create our own design, our own imprint in the world by using any material in our grasp.  We might use mica powders, shimmering acrylics, caning, blends, marbling…anything we can use to define ourselves.  Something as simple as the end of a straw might suddenly become the best tool to make dragon scales.

In our quest, we often look around us for inspirations.  Jokingly at times (and more often demanding), we call upon our muse to help us create.  It can be as something as small as a color that will inspire a piece.  Other times, it is a texture that we see that we must recreate in clay.  Often, it seems, we fall back to the inspiration of the most perfect artist of all, Nature herself.  

Sometimes, you cannot improve upon perfection.  We try…with stunning and amazing effects!  But to meld the beauty of nature’s creation with the talent of sculpting polymer clay takes a great deal of talent and patience.  

I have selected just a few of the talented artists in the Polymer Clay Smooshers Guild that merge the beauty they find in nature with their talent of working with clay.  You can see their love for both materials coming through each piece, not overshadowing the other, but complementing it perfectly.


Tamed created this beautiful miniature husky using polymer clay, that she then delicately attached Kid Mohair, Alpaca, and Cheviot wools too, finishing with gorgeous glass blue eyes.


Sassy Clay Creations designed this gorgeous mirror using polymer clay, sand and shells to reflect the beauty of the ocean during one of the Smoosher’s Monthly Challenges.


C.Newcomb’s Woodworking carved this unique and whimsical keychain from poplar wood and then filled the word “Bazinga” with polymer clay.  Extra points to you, should you know what popular tv show character made this phrase so “poplar.” Ok, bad pun, I apologize.


Clay Cat Shop used the perfect piece of white coral to serve as a chair for this gorgeous mermaid and her two loving daughters. 


Cat’s Wire works in a variety of mediums, including crocheting wire.  She designed this beautiful crocheted flower, then planted it in a bed of black rocks and added a tiny polymer clay snail to finish the piece off.  What a wonderful way to combine three styles into one.

The reason I chose this topic is that it focuses on one of my favorite styles that I love to use.  My best example is my line of hermit crabs.  I used to collect all of these beautiful shells during my travels, but had no way to really display them.  After contemplating on them for years and even playing around with this idea for the past five years, I finally got the nerve to make an attempt at creating a hermit crab. 


Now, when I got shell hunting, I look for pieces that “speak” to me.  Pieces that want me to create and merge them with clay into something that can be enjoyed for years to come.  Pieces that enhance their beauty, like all of the artists in this blog and our guild do on a daily basis. <3

Friday, August 26, 2011

Mica Shift - Amazing Designs

Article by Amazing Designs

I agree with Strange Whimsy in the use of Sculpey Premo Accents for Mica Shift. It is a soft clay and allows for a wonderful alignment of the mica particles in the shift, although the older Premo metallics can work equally as well. It does take a delicate touch when applying slices or shaping beads to prevent a blurring of the shift. Have not done much with colors other than the metallics, but here are two examples of what I have done with this fantastic technique.

This bracelet was done using the older Sculpey Premo Gold and Copper. I combined the colors until I was sure the shift would show well, and then sliced the cane with a modified Mokume Gane method. It turned out amazing shading:

Posted Image

This is a close up of the nugget beads I did for a necklace using the newer Sculpey Premo Accent colors of Antique Gold, Copper and Silver. The cubes are solid shapes after combining the three colors:


Posted Image

Sunday, August 21, 2011

Invitation to our wonderful fans

Some of our fans also work with polymer clay. This year we cordially invite you to participate in our 3rd annual Masquerade Clay Ball which will take place right here at http://polymerclaysmooshers.blogspot.com the entire month of October.

The requirements for entering:
Fans may enter 1 mask per person.
Mask may be any size. Life size, jewelry size, etc. size does not matter.
Mask must be made by you and must be either made with or incorporate polymer clay components.
Photo of mask must be sized no wider than 400 pixels.

Send one photo of your mask to no later than September 26th, 2011. Please put "Mask" in the subject line of your email.
Also give us the username (or real name, your choice) and one link that you would like to appear with your mask photo on our blog. You may use your website, blog or shop. If it is your shop link, it does not have to be on ArtFire even though that is where the Smooshers are based.
You do not have to submit a link but a name will be required.
Send your entries to...


haffina@gmail.com 

Please note that this email is not checked regularly so if you have any questions contact BeadsByHaffina on ArtFire.

Thank you all so much! We love our fans!

Studio Stroll - averilpam

by averilpam

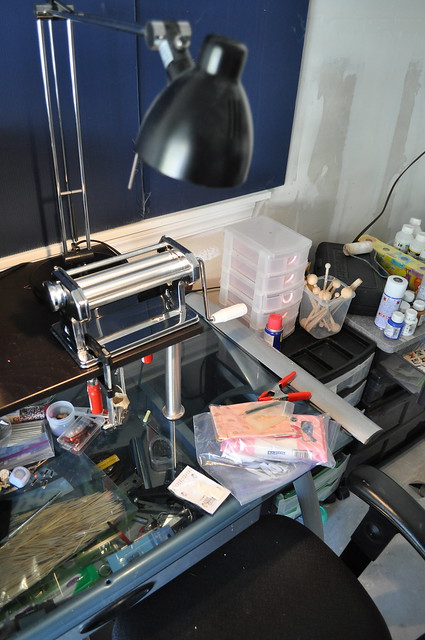
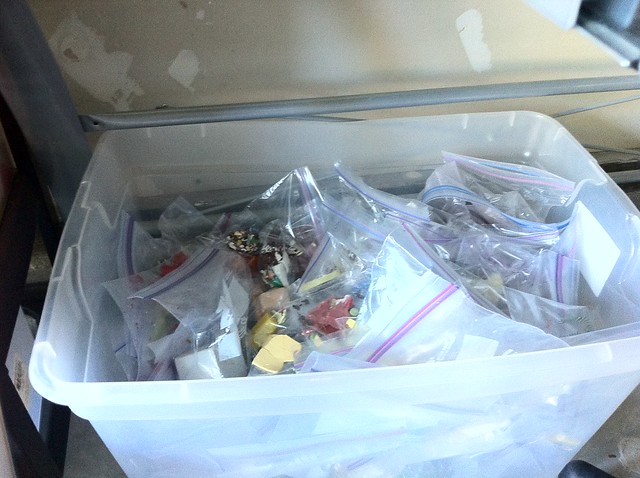
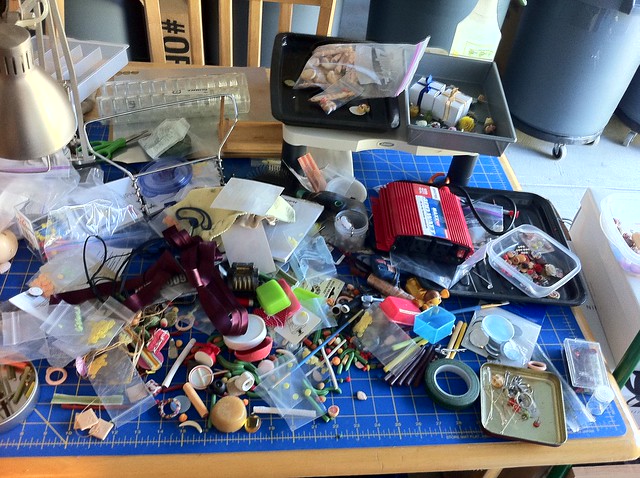
Here are a few photos of my work areas. I've not included all my storage as it's all over the place so would be too many photos I think!

The desk was originally my computer desk until I got my laptop, then I used it for my sewing machine but as I've not been doing so much sewing lately I've now started to use it for my polymer clay work, which is much easier than using a lap tray (I still use that for jewellery making) and means I can leave stuff out.


tool boxes by averilpam, on Flickr

desk-2 by averilpam, on Flickr

desk-1 by averilpam, on Flickr

Visit averilpam

Saturday, August 20, 2011

ClayitAgain's WIP - Updated

Back in May ClayitAgain shared with us the very beginnings of one of her projects. Over the next few weeks we will continue the journey. Let's see where we are up to.

Last time I showed the hands and feet (not quite finished), the body armature, and the cactus armature. I'm still not sure what the dude will be doing but I got the cactus done. I mixed all my misc. greens, a little black and pearl to make a stripey green sheet

Posted Image
cactus colors by clayitagain, on Flickr

and used it to cover the cactus...
Posted Image
cactus is covered by clayitagain, on Flickr
Then I etched grooves all over it so that I can antique it later

Someone asked how I was going to attach it to the base and here is what I use-brass rods that slide inside each other. A hole is drilled up the bottom of the middle of the cactus (since the center is only foil, and the rod with the larger diameter is inserted. Then a hole drilled on the plaque and the other rod seated. The rods slide together and hold in place.

Posted Image
cactus rod by clayitagain, on Flickr

:)Next up is the feet...complete with a small version of huarachi sandals


Friday, August 19, 2011

Mica Shift - Strange Whimsy

 Article by Strange Whimsy

I am in love with mica shift clays. I feel that it give's my pieces a deep luster that I can't acheive with inclusions of glitter or powders, in addition to being not overly shiny. My mica shift clay brand of choice is Premo Affects by scuptly, it's durable and its got a broad color selection to choose from. Its the shiny/dull side aspect that I use for my crackle technique and just general pretty two-tone color effects on my flowers and leaves. I've seen caner's use that effect to make some fantastic checkered cane's, but I have no skill in that direction


This necklace is the perfect example of casual mica shift. The pink color is achieved by mixing copper premo brand with some pearl and a tad of burnt umber. After conditioning I let them cool down so when I'm shaping the hearts I don't squish the variation of color out. I didn't glaze these beads because I was after the most subdued color.


This piece has a satin glaze to bring out the subtle shade difference's in this mica shift piece. I used silver with a couple browns for the base color, the crackle turned out beautifully if I do say so myself :)

On a side note, not all gold and silver clays are mica shift so check the label

Wednesday, August 17, 2011

Change is upon us...

It is a time of change at the Polymer Clay Smooshers. It is with great sadness that our amazing guildmaster, Coltpixy, has decided it is time to step down and hand the guild over to someone else. Coltpixy has been incredible and has steered this guild for 3 years, making it one of the best known groups to come out of ArtFire.

It is with some trepidation that I have agreed to step up... Coltpixy is a heck of an act to follow! There are bound to be some changes, but my main goal is to keep the momentum created by Coltpixy going into the future for the benefit of the guild members and the Polymer Clay community at large.

I will take this opportunity to thank Coltpixy for all her hard work over the last 3 years, and hope that she continues to be a part of our guild when the time is right.

Coltpixy, you are a shining light in the handmade and polymer clay community, and a true friend.

Tuesday, August 9, 2011

gamekitty's studio space

by gamekitty

posted image


This is the general gist of the garage/studio area. I had an indoor studio before but it is hard to keep it indoors when your in-laws move into the place in a hurry.

posted image


This is my clay desk. I specifically have the office glass desk so that I can keep the clay cool.

posted image


... and this is a random view of the clay desk!

posted image


This is my toaster oven. It lasted about 2 years :) Very happy with it.

posted image


I don't do drawers, I do bucket of polymer clay. It is mostly premo but lately I have been trying to either leech the stuff out so I can use it or simply mix it with fimo classic or kato, but even they are not immune to the softness!

posted image


I guess you can call this my creative mess while I sort things out to find tools, miniatures, etc... Things get lost so often in boxes I am glad I can take them out and sort them now.

Visit gamekitty.artfire.com

Monday, August 8, 2011

The Story of A Most Forgiving Medium

by AmazingDesigns

Learn from Mistakes??? How about more that once!!! The life of these beads is a journey from one of my first projects, to several weeks ago. The finished product can be seen in My Artfire.

The Story of A Most Forgiving Medium: Polymer Clay

posted image


One of my first attempts at stamped beads was (A) in a copper overlay on green PC. I made them in several different shapes as seen in the next pictures. HOWEVER, I was Not happy with how they turned out. I was hoping for something close to a Mokume Gane look, but as you can see, failed terribly. So, lets add some brown acrylic paint (B) to give them an antiqued look. Not much better! What else is in my drawer? How about some gold embossing powder (C) and rebake? Nope, not applied evenly enough!

So they got put away in the "maybe some day" box. Until, I found a lesson on using "PC putty", making a slurry out of colored polymer clay and Translucent Liquid Sculpey, which could then be applied to indentation on beads (D), and rebaked again. Then sand, sand, sand and buff. Hmmm, getting closer.

Picked the best one of the bunch (E) and wire wrapped it. As a finishing touch, add High Gloss Glaze (F) and voila, Ugly Duckling no more!

posted image


Most of the others were made into a necklace and a pair of earrings, both of which have already sold!

Visit AmazingDesigns.artfire.com

Friday, August 5, 2011

Beach Challenge

Last time you challenged us to create something with the theme Beach. Here are our entries. Click on the corresponding username to see larger image, more images and descriptions.
Please vote in the poll on the right column of this blog to let us know what theme you would like to see us work on next. Poll ends Sunday, August 7th 2:00pm Google time.


posted image
DreamWeaversDesigns --- averilpam --- StrangeWhimsy


posted image
SassyClayCreations --- AmazingDesigns --- GEMSPCCREATIONS


posted image
ValeriesStuff --- ArtFairlyAware --- DesertWindDesigns


posted image
ColtPixy --- MortimerInc --- BewitchingDreams


posted image
HaffinaCreations --- BeadsByHaffina --- HaffinasMinis
Thursday, August 4, 2011

Learning from mistakes: techniques and products

by gundowerks

There are times that I think I've made more mistakes and failures than successes! Fortunately the wonderful polyclay community has saved me tons of both by their generous sharing of information, techniques and ideas. Naturally there are a number of things that you just have to learn from your own trial and error. The following are horrible mistakes I've made, that have ruined countless hours and $$ of supplies:

*If you tumble sand beads too long without checking, clay colors that do not go all the way through a bead will sand off!! It's possible to tumble beads that you've applied to clay to (like cane slices), but you have to be very careful.

*Fimo Gel scorches if it's baked too long. It covers your lovely just-finished and covered mosaic pieces with a creeping black scorch.

*Making sure you use products that have been tried and tested by many people before you is essential! In other words, don't use some varnish with a name you don't recognize and never use a spray coating.

Over the years I've tossed so many pieces into the trashcan because I've messed up so bad they can't be recovered. It hurts for a clay miser like me!!

posted image
Visit gundowerks.artfire.com

Wednesday, August 3, 2011

Favorite Tool: Push Drill

by tonjastreasures

Besides the usual pasta machine, acrylic rod and clay blade I LOVE my push drill !!! Everyone should invest in one :) Couldn't live without it.

posted image

posted image
Visit tonjastreasures.artfire.com

Monday, August 1, 2011

Haffina's Other Interests

by HaffinaCreations aka BeadsByHaffina aka HaffinasMinis

I do many other crafts aside from working with Polymer Clay.
Many years ago the main craft I did was cross stitch and knitting. Via this I was introduced to bead weaving, and later to jewellery making - which I guess would be my main craft currently. Although I use polymer clay pieces in a lot of my jewellery, I also use many other materials, including gemstones and metal. As part of my jewellery making I am also a Chainmailler (I'm the guildmaster of the ArtFire Chainmaille Guild), and frankly quite obsessed with linking rings together.

posted image


I still bead weave quite a lot, enjoying the process and learning new techniques. I often combine techniques from different crafts into one piece, such as combining bead weaving with chainmaille, or combining polymer clay with bead weaving or chainmaille.

posted image


In the last year or so I have become more and more interested in miniatures and this has lead to doll customisation. I love the process of taking a doll, such as a Barbie, and removing her clone-like appearance, then giving her a whole new look. I also find the process of rerooting a doll very theraputic... nothing quite like jabbing a needle repeatedly into a head LOL.

posted image


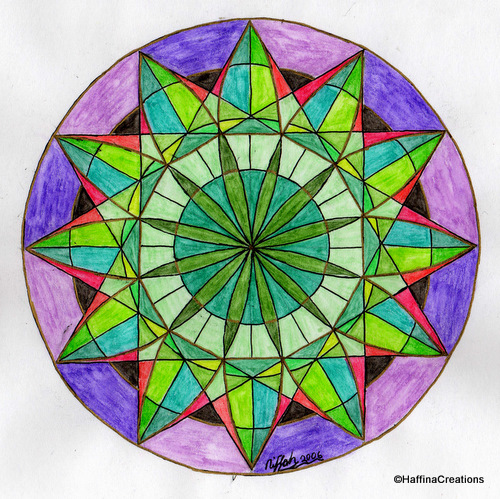
One of my favourite creative pursuits is one that I don't really get a lot of time for anymore. I discovered Mandalas quite by accident (thanks to the internet) back in 2005. It is amazingly fulfilling and almost meditative creating these, and it is a something I am working towards using in my clay work.

mandala0025

Visit HaffinaCreations, BeadsByHaffina, HaffinasMinis